The world of Machine-Learning (ML) and Artificial Intelligence (AI) is governed by libraries, as the implementation of a full framework from scratch requires a lot of work. ML and data-science engineers and researchers, therefore don’t generally build their own libraries. Instead they use and extend existing libraries written in python or R. One of the most popular current python ML libraries is scikit-learn. This library provides access to scores of ML-models and methods which can be combined at will via the use of a consistent global API.
However, no matter how many models there are included in such a library, chances are that a model you wish to use (or the extension you envision for an existing model) is not implemented. In such a case, you do not want to write an entire ML framework from scratch, but just create your own model and fit it into the existing framework. Within the scikit-learn framework this can be done with relative ease, as is explained in this short tutorial. As an example, I will be building a regressor class for the LS-SVM model.
1. The ML-model: LS-SVM?
Least-Squares Support Vector Machines is a type of support vector machines (SVM) initially developed some 20 years ago by researchers at the KULeuven (and is still being further developed, funded via several ERC grants). It’s a supervised learning machine learning approach in which a system of linear equations is solved using the kernel-trick.
So how does it work in practice? Assume, we have a data set of data points (xi,yi), with xi the feature vector and yi the target of the data point (or sample) i. Depending on whether you want to perform classification or regression, training the model corresponds to solving the following system of equations (represented in their matrix form as):
Classification:
![\begin{bmatrix} 0 & Y^T \\ Y & \Omega + \gamma^{-1}\mathbb{I} \end{bmatrix} \left[ \begin{array}{c} b \\ \alpha \end{array} \right] = \left[ \begin{array}{c} 0 \\ 1 \end{array} \right]](https://s0.wp.com/latex.php?latex=+%5Cbegin%7Bbmatrix%7D+0+%26+Y%5ET+%5C%5C+Y+%26+%5COmega+%2B+%5Cgamma%5E%7B-1%7D%5Cmathbb%7BI%7D+%5Cend%7Bbmatrix%7D+%5Cleft%5B+%5Cbegin%7Barray%7D%7Bc%7D+b+%5C%5C+%5Calpha+%5Cend%7Barray%7D+%5Cright%5D+%3D+%5Cleft%5B+%5Cbegin%7Barray%7D%7Bc%7D+0+%5C%5C+1+%5Cend%7Barray%7D+%5Cright%5D+&bg=ffffff&fg=000000&s=0 "\begin{bmatrix} 0 & Y^T \\ Y & \Omega + \gamma^{-1}\mathbb{I} \end{bmatrix} \left[ \begin{array}{c} b \\ \alpha \end{array} \right] = \left[ \begin{array}{c} 0 \\ 1 \end{array} \right]")
Regression:
![\begin{bmatrix} 0 & 1^T \\ 1 & \Omega + \gamma^{-1}\mathbb{I} \end{bmatrix} \left[ \begin{array}{c} b \\ \alpha \end{array} \right] = \left[ \begin{array}{c} 0 \\ Y \end{array} \right]](https://s0.wp.com/latex.php?latex=+%5Cbegin%7Bbmatrix%7D+0+%26+1%5ET+%5C%5C+1+%26+%5COmega+%2B+%5Cgamma%5E%7B-1%7D%5Cmathbb%7BI%7D+%5Cend%7Bbmatrix%7D+%5Cleft%5B+%5Cbegin%7Barray%7D%7Bc%7D+b+%5C%5C+%5Calpha+%5Cend%7Barray%7D+%5Cright%5D+%3D+%5Cleft%5B+%5Cbegin%7Barray%7D%7Bc%7D+0+%5C%5C+Y+%5Cend%7Barray%7D+%5Cright%5D+&bg=ffffff&fg=000000&s=0 "\begin{bmatrix} 0 & 1^T \\ 1 & \Omega + \gamma^{-1}\mathbb{I} \end{bmatrix} \left[ \begin{array}{c} b \\ \alpha \end{array} \right] = \left[ \begin{array}{c} 0 \\ Y \end{array} \right]")
with  the vector containing all targets yi,
  a hyperparameter, and
  a kernel function
 ") .
.
Once trained, results are predicted (in case of regression) by solving the following equation:
=\sum_{k=1}^{N}{\alpha_k K(\mathbf{x_k,x}) + b}")
More details on these can be found in the book of Suykens, or (if you prefer a shorter read) this paper by Dilmen.
The above model is available through the Matlab library developed by the Suykens group, and has been translated to R, but no implementation in the python scikit-learn library is available, therefore we set out to create such an implementation following the scikit-learn API. Our choice to follow the scikit-learn API is twofold: (1) we want our new class to smoothly integrate with the functionalities of the scikit-learn library (I’m building a framework for automated machine learning on this library, hence all my models need to show the same behavior and functionality) and (2) we want to be lazy and implement as little as possible.
2. Creating a Simple Regressor Class.
2.1. Initialization
Designing this Class, we will make full use of OOP (Similar ideas as in my fortran tutorials), inheriting behavior from scikit-learn base classes. All estimators in scikit-learn are derived from the BaseEstimator Class. The use of this class requires you to define all parameters of your class as keyword arguments in the __init__ function of your class. In return, you get the get_params and set_params methods for free.
As our goal is to create a regressor class, the class also needs to inherit from the RegressorMixin Class which provides access to the score method used by all scikit-learn regressors. With this, the initial implementation of our LS-SVM regressor class quickly takes shape:
class LSSVMRegression(BaseEstimator, RegressorMixin):
   """
   An Least Squared Support Vector Machine (LS-SVM) regression class

   Attributes:
   - gamma : the hyper-parameter (float)
   - kernel: the kernel used (string: rbf, poly, lin)
   - kernel_: the actual kernel function
   - x : the data on which the LSSVM is trained (call it support vectors)
   - y : the targets for the training data
   - coef_ : coefficents of the support vectors
   - intercept_ : intercept term
   """

   def __init__(self, gamma:float=1.0, kernel:str=None, c:float=1.0,
           d:float=2, sigma:float=1.0):
      self.gamma=gamma
      self.c=c
      self.d=d
      self.sigma=sigma
      if (kernel is None):
         self.kernel='rbf'
      else:
         self.kernel=kernel

      params=dict()
      if (kernel=='poly'):
         params['c']=c
         params['d']=d
      elif (kernel=='rbf'):
         params['sigma']=sigma

      self.kernel_=LSSVMRegression.__set_kernel(self.kernel,**params)

      self.x=None
      self.y=None
      self.coef_=None
      self.intercept_=None
All parameters have a default value in the __init__ method (and with a background in Fortran, I find it very useful to explicitly define the intended type of the parameters). Additionally, the same name is used for the attributes to which they are assigned. The kernel function is provided as a string (here we have 3 possible kernel functions: the linear (lin), the polynomial (poly), and the radial basis function (rbf) ) and linked to a function pointer via the command:
self.kernel_=LSSVMRegression.__set_kernel(self.kernel,**params)
The static private __set_kernel method returns a pointer to the correct kernel-function, which is later-on used during training and fitting. The get_params, set_params, and score methods, we get for free so no implementation is needed, but you could override them if you wish. (Note that some tutorials recommend against overriding the get_params and set_params methods.)
2.2. Fitting and predicting
As our regressor class should be interchangeable with any regressor class available by scikit-learn, we look at some examples to see which method-names are being used for which purpose. Checking the LinearRegression model and the SVR model, we learn that the following methods are provided for both classes:
| method |
task |
LS-SVM class |
| __init__ |
Initialize object of the class. |
Implemented above (ourselves) |
| get_params |
Get a dictionary of class parameters. |
Inherited from BaseEstimator |
| set_params |
Set the class parameters via a dictionary. |
Inherited from BaseEstimator |
| score |
Return the R2 value of the prediction. |
Inherited from RegressorMixin |
| fit |
Fit the model. |
to do |
| predict |
Predict using the fitted model. |
to do |
Only the fit and predict methods are still needed to complete our LS-SVM regressor class. The implementation of the equations presented in the previous section can be done in a rather straight forward way using the numpy library.
import numpy as np

def fit(self,X:np.ndarray,y:np.ndarray):
   self.x=X
   self.y=y
   Omega=self.kernel_(self.x,self.x)
   Ones=np.array([[1]]*len(self.y))

   A_dag = np.linalg.pinv(np.block([
         [0, Ones.T ],
         [Ones, Omega + self.gamma**-1 * np.identity(len(self.y))]
         ]))
   B = np.concatenate((np.array([0]),self.y), axis=None)

   solution = np.dot(A_dag, B)
   self.intercept_ = solution[0]
   self.coef_ = solution[1:]

def predict(self,X:np.ndarray)->np.ndarray:
   Ker = self.kernel_(X,self.x)
   Y=np.dot(self.coef_,Ker.T) +self.intercept_
   return Y
Et voilà, all done. With this minimal amount of work, a new regression model is implemented and capable of interacting with the entire scikit-learn library.
3. Getting the API right: Running the Model using Scikit-learn Methods.
The LS-SVM model has at least 1 hyperparameter: the factor and all hyperparameters present in the kernel function (0 for the linear, 2 for a polynomial, and 1 for the rbf kernel). To optimize the hyperparameters, the GridsearchCV Class of scikit-learn can be used, with our own class as estimator.
For the LS-SVM model, which is slightly more complex than the trivial examples found in most tutorials, you will encounter some unexpected behavior. Assume you are optimizing the hyperparameters of an LS-SVM with an rbf kernel: and  .
.
from sklearn.model_selection import GridSearchCV
...
parameters = {'kernel':('rbf'),
    'gamma':[0.001, 0.01, 0.1, 1.0, 10.0, 100.0, 1000.0],
    'sigma':[0.001, 0.01, 0.1, 1.0, 10.0, 100.0, 1000.0]}
lssvm = LSSVMRegression()
clf = GridSearchCV(lssvm, parameters)
clf.fit(X, y)
...
When you plot the quality results as a function of , you’ll notice there is very little (or no) variation with regard to  . Some deeper investigation shows that the instances of the LSSVMRegression model use different values of the
  attribute, however, the attribute does not change in the kernel function. This behavior is quite odd if you expect the GridsearchCV class to create a new class instance (or object) using the __init__ method for each grid point (a natural assumption within the context of parallelization). In contrast, the GridsearchCV class appears to be modifying the attributes of a set of instances via the set_params method, as can be found in the 2000+ page manual of scikit-learn, or here in the online manual:
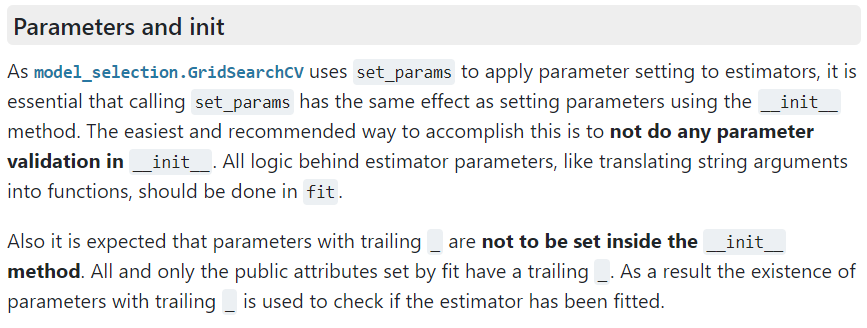
Scikit-learn manual section of parameter initialization of classes
In programming languages like C/C++ or Fortran, some may consider this as bad practice as it entirely negates the use of your constructor and splits the initialization section. For now, we will consider this a feature of the Python scripting language. This also means that getting a static class function linked to the kernel_ attribute requires us to override the get_params method (initializing attributes in a fit function is just a bridge too far 😉 ).
def set_params(self, **parameters):
   for parameter, value in parameters.items():
      setattr(self, parameter, value)

   params=dict()
   if (self.kernel=='poly'):
      params['c']=self.c
      params['d']=self.d
   elif (self.kernel=='rbf'):
      params['sigma']=self.sigma
   self.kernel_=LSSVMRegression.__set_kernel(self.kernel,**params)

   return self
For consistency the get_params method is also overridden. The resulting class is now suitable for use in combination with the rest of the scikit-learn library.
4. The LS-SVM Regressor on Github
At the moment of witting no LS-SVM regressor class compatible with the scikit-learn library was available. There are some online references available to Python libraries which claim to have the LS-SVM model included, but these tend to be closed source. So instead of trying to morph these to fit my framework, I decided to use this situation as an opportunity to learn some more on the implementation of an ML model and the integration of this model in the scikit-learn framework. The resulting model is extended further to deal with the intricacies of my own framework aimed at small datasets, which is beyond the scope of the current tutorial. Since I believe the LS-SVM regressor may be of interest to other users of the scikit-learn library, you can download it from my github-page:
5. References
- J.A.K. Suykens et al., “Least Squares Support Vector Machines“, World Scientific Pub. Co., Singapore, 2002 (ISBN 981-238-151-1)
- E. Dilmen and S. Beyhan, “A Novel Online LS-SVM Approach for Regression and Classification”, IFAC-PapersOnLine Volume 50(1), 8642-8647 (2017)
- D. Hnyk, “Creating your own estimator in scikit-learn“, webpage
- T. Book, “Building a custom model in scikit-learn“, webpage
- “User guide: create your own scikit-learn estimator“, webpage
DISCLAIMER: Since Python codes depreciate as fast as they are written, links to the scikit-learn library documentation may be indicated as outdated by the time you read this tutorial. Check out the most recent version in that case. Normally, the changes should be sufficiently limited not to impact the conclusions drawn here. However, if you discover a code-breaking update, feel free to mention it here in the comments section.


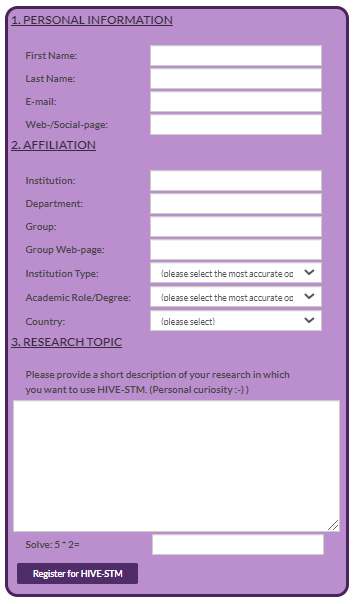 What started out with the intention of being an almost trivial exercise in building a web-form, turned into a steep learning curve about web-development and cyber-security. I am aware there exists many tools which generate forms for websites or even provide you a platform which hosts the form (e.g.,

 A new year, a new beginning.